Thursday, October 29, 2009

Liferay 5.1.1 with jQuery ThemeRoller Integration Demo

Yes, your headphones/speakers are working fine. There's no sound. ;)

This is the little demo of Liferay with the ThemeRoller integrated in to the theme. This project isn't quite done but it's getting there!



Tuesday, October 20, 2009

Liferay 5.2.3 - Change Navigation to an Accordian

1. Change the navigation.vm file in your theme to the following (Note, change the options for different effects):

<script type="text/javascript">
jQuery().ready(function(){
jQuery('#accordian-nav').accordion({
active: false,
header: '.head',
event: 'mouseover',
fillSpace: true,
active: '.selected',
animated: 'easeslide'
});

});

</script>

<div id="navi" class="sort-pages modify-pages">
<ul id="accordian-nav">
#foreach ($nav_item in $nav_items)
#if ($nav_item.isSelected())
#set ($nav_item_class = "selected")
#else
#set ($nav_item_class = "")
#end

<li class="$nav_item_class">
<a class="head" href="$nav_item.getURL()" $nav_item.getTarget()><span>$nav_item.getName()</span></a>

#if ($nav_item.hasChildren())
<ul class="">
#foreach ($nav_child in $nav_item.getChildren())
#if ($nav_child.isSelected())
#set ($nav_child_class = "selected")
#else
#set ($nav_child_class = "")
#end

<li class="$nav_child_class">
<a href="$nav_child.getURL()" $nav_child.getTarget()>$nav_child.getName()</a>
</li>
#end
</ul>
#end
</li>
#end
</ul>
</div>

2. Add the CSS to your custom.css file (You'll definitely want to modify the colors):

/* Accordian Navigation */
#navi {
border:1px solid #5263AB;
margin:0px;
padding:0px;
text-indent:0px;
width:200px;
}
#navi a.head {
cursor:pointer;
border:1px solid #43AEE4;
color:#336699;
display:block;
font-weight:bold;
margin:0px;
padding:0px;
text-indent:14px;
text-decoration: none;
background-color: green;
}
#navi a.head:hover {
color:#000;
}
#navi a.selected {


}
#navi a.current {
background-color:#FFFF99;
}
#navi ul {
border-width:0px;
margin:0px;
padding:0px;
text-indent:0px;
height: auto!important
}
#navi li {
list-style:none outside none; display:inline;
}
#navi li li a {
color:#000000;
display:block;
text-indent:10px;
text-decoration: none;
}
#navi li li a:hover {
background-color: #E3F1FA;
color:#FF0000;
}

Example:


The only thing I don't particularly care for at this stage is that it moves all content items down. Solvable, but good enough for now. ;)

Only tested in IE7 and FF3

Monday, October 19, 2009

Installing Liferay 5.2.3 Using Postgres 8

1. Install and create lportal database (Note: for this example I used lportal523)

- Open pgAdmin III (Start Menu on Win Systems)
- Enter the name you want to use for the database (ex. lportal523)


2. Download the appropriate driver version and place in lib/ext

Version 3:
Use this if you're running JVM 1.5
http://jdbc.postgresql.org/download/postgresql-8.4-701.jdbc3.jar

Version 4:

Use this if you're running JVM 1.6

http://jdbc.postgresql.org/download/postgresql-8.4-701.jdbc4.jar

Keep in mind that if you're using the Liferay bundle defaults, you're using JVM 1.5.

3. Set the properties in the portal-ext.properties file

jdbc.default.driverClassName=org.postgresql.Driver
jdbc.default.url=jdbc:postgresql://localhost:5432/lportal523
jdbc.default.username=postgres
jdbc.default.password=whateveryourpasswordis

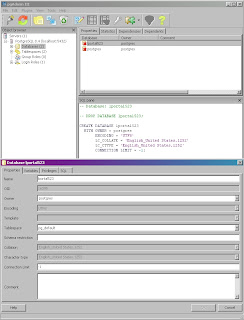
4. Startup Liferay. Your database will look like this:


Enjoy!

Thursday, October 15, 2009

Updated Jan 2010: Liferay - Cool Breadcrumb

I decided to update this after I found some problems with the original method I had posted. Liferay uses breadcrumb styles 1 and 2 for other things for which I did not want to use the apple style but in addition, I've made it into a self-contained cool crumb. This solution is designed to work from directly in the theme and has been tested in 5.2.3.

So you want a cool looking breadcrumb? Perhaps one that's kind of Applish? Well these instructions will get you what you want.


1. Create a file in webapps\ROOT\html. For this example we'll call it crumb.jsp and place the following in it:

<%@ include file="/html/taglib/ui/breadcrumb/init.jsp" %>

<%
StringBuilder sb = new StringBuilder();
sb.append("<ul class='breadcrumb2'>");
_buildBreadcrumb(selLayout, selLayoutParam, portletURL, themeDisplay, true, sb);
%>

<%= sb.toString() %>

<%!
private void _buildBreadcrumb(Layout selLayout, String selLayoutParam, PortletURL portletURL, ThemeDisplay themeDisplay, boolean selectedLayout, StringBuilder sb) throws Exception {

String layoutURL = _getBreadcrumbLayoutURL(selLayout, selLayoutParam, portletURL, themeDisplay);
String target = PortalUtil.getLayoutTarget(selLayout);

StringBuilder breadCrumbSB = new StringBuilder();

breadCrumbSB.append("<li><a href=\"");
breadCrumbSB.append(layoutURL);
breadCrumbSB.append("\" ");
breadCrumbSB.append(target);
breadCrumbSB.append(">");

breadCrumbSB.append(HtmlUtil.escape(selLayout.getName(themeDisplay.getLocale())));

breadCrumbSB.append("</a></li>");


Layout layoutParent = null;
long layoutParentId = selLayout.getParentLayoutId();
if (layoutParentId != LayoutConstants.DEFAULT_PARENT_LAYOUT_ID) {
layoutParent = LayoutLocalServiceUtil.getLayout(selLayout.getGroupId(), selLayout.isPrivateLayout(), layoutParentId);
_buildBreadcrumb(layoutParent, selLayoutParam, portletURL, themeDisplay, false, sb);


sb.append(breadCrumbSB.toString()+"");
}
else {
sb.append(breadCrumbSB.toString()+"");
}
}

private String _getBreadcrumbLayoutURL(Layout selLayout, String selLayoutParam, PortletURL portletURL, ThemeDisplay themeDisplay) throws Exception {
if (portletURL == null) {
return PortalUtil.getLayoutURL(selLayout, themeDisplay);
}
else {
portletURL.setParameter(selLayoutParam, String.valueOf(selLayout.getPlid()));

return portletURL.toString();
}
}
%>


2. In your custom.css file add the following (remember to change the urls to your server):

.breadcrumb2
{
font: 11px Arial, Helvetica, sans-serif;
background-image:url('../images/theme1/bc_bg.png');
background-repeat:repeat-x;
height:30px;
line-height:30px;
color:#9b9b9b;
border:solid 1px #cacaca;
width:100%;
overflow:hidden;
margin:0px;
padding:0px;
}


.breadcrumb2 li
{
list-style-type:none;
float:left;
padding-left:10px;
}

.breadcrumb2 a
{
height:30px;
display:block;
background-image:url('../images/theme1/bc_separator.png');
background-repeat:no-repeat;
background-position:right;
padding-right: 15px;
text-decoration: none;
color:#454545;
}
.breadcrumb2 a:hover
{
color:#35acc5;
}
.home
{
border: none;
margin: 8px 0px;
}

3. Last but not least, here are the images:


This last part will include your new breadcrumb on all pages. Open the portal_normal.vm and include:

$theme.include("/html/crumb.jsp")


Vaadin Eclipse Plugin

Well I figured since Liferay will be bundling Vaadin in to the mix that I would get acquainted with it. I did the instructions at http://tiny.cc/8wzZS but deviated in the Vaadin version (I used 612) which made it apparently bomb. Hmmm... Oh well...

Eclipse: 3.4.1 - Ganymede
Went on to try the Eclipse plugin. What am I missing here?

I went to File -> New -> Vaadin Project and it does NOTHING. I have to go to File -> New -> Other -> Vaadin Project.

Chose the following options:
Configuration: Default Configuration
Deployment Configuration: Generic Portlet
(Vaadin version 6.1.2) Clicked the Download button

Hit Finish. Hit Cancel.

I have the default System Libs (which I could have gotten from creating a new Java Project). A look at the Build Path reveals I only have the JRE. (I would have thought the Vaadin jar file would have been there since afterall I did download it to god knows where) and in the src I have nothing (I thought I would have at least gotten a class with a GenericPortlet extension but I guess not).

At this point I'm completely clueless why on earth Liferay would choose to integrate this product. Since Vaadin uses GWT why not just use GWT? I'm not a fan of a GWT either because of the bloating but there's some cool tools for it at least.

I hope Liferay spins it's magic on this cause right now I'm sorely disappointed.


GenericPortlet & Ajax

Anyone familiar with form submission knows that the processAction takes care of the processing as far as the backend goes but in case you're wondering how to process an Ajax call, look no further.

In your JSP, you must use the ResourceURL ()

ResourceURL resourceURL = renderResponse.createResourceURL();


For this quick example, I use JavaScript to handle the call:


function delFav(thisFav) {
if(confirm("This will delete your favourite. Are you sure you want to continue?")) {
$("div#showaddfav").html(" Deleting your favourite. Please wait.");
$.post("<%=resourceURL%>", { delFav: thisFav, usersId: "<%=themeDisplay.getUserId()%>" },
function(data){

if(checkType("del-saved", data) != -1) { $("#showaddfav").html("<span class="portlet-msg-success">Your favourite was deleted. Congrats!</span>"); }
if(checkType("error", data) != -1) { $("#showaddfav").html("<span class="portlet-msg-error">An unknown error has occured. Please notify the Administrator.</span>"); }
});
} else { return; }

}

function checkType(expr, thisUrl) {
return thisUrl.search(expr);
}


And your portlet should use the serveResource for processing:


import java.io.PrintWriter;
import javax.portlet.ResourceRequest;
import javax.portlet.ResourceResponse;

public void serveResource(ResourceRequest req, ResourceResponse resp)
throws PortletException, IOException {
resp.setContentType("text/html");
PrintWriter writer = resp.getWriter();

// User want to delete
String delFav = ParamUtil.getString(req, "delFav");

try {

writer.print("<div id="response-wrap">del-saved</div>");

} catch (PortalException e) {
writer.print(" <div id="response-wrap">error</div>");
e.printStackTrace();
} catch (SystemException e) {
writer.print(" <div id="response-wrap">error</div>");
e.printStackTrace();
}
writer.close();
}


This of course is just example code but if you want to pass a tidbit of info back to your jsp you have to use the print (and don't forget to close the writer).

Wednesday, October 14, 2009

How to Localize a Browse Button

Yes, I have seen more complaints about this than you can image but the good news is not only can you 'localize' it but make it pretty. Wanna see what I'm talking about?


In case you're not familiar with the problem, a form input type of "file" connects to the client's operating system via an Application Programming Interface (API). That familiar window that allows us to select our file is displayed depending on your operating system (*nix, Windows, Mac). Because of this, it was deemed as a security risk to allow a developer to interfere in any way with this functionality.

What browser will this work on?

First and foremost, this will work in IE 6 and 7, FF 2 and 3, and Safari on MAC.

What you need


1) 2 Images: One to display English one to display French. (Or whatever languages you choose.)


Admittedly, these aren't pretty but they'll do. The file name you give your images plays a roll (well at least for this example). The English one I've called browseen_US and browsefr_FR. Why? Because when we swap (by pressing the French or English link) the buttons will swap based on locale. In addition, the image dimensions should stay the same. In this case they're not quite the same so you can see the difference.

2) The Code (Read the comments throughout)


<html>
<head>
<script type="text/javascript">
//Set your default language
var myLang="fr_FR";

//The 'switchTo...' functions will be triggered when we select the
//English or French link.
//The call to initFileUploads updates the UI.
function switchToEnglish() {
myLang="en_US";
initFileUploads();
}

function switchToFrench() {
myLang="fr_FR";
initFileUploads();
}

//This function will update the UI. Note this is where the magic happens.
//We will be using a regular file input type but we use a combination
//of CSS and JavaScript to overlay the English and French buttons.
function initFileUploads() {

var fakeFileUpload = document.createElement('div');

fakeFileUpload.className = 'fakefile';
fakeFileUpload.appendChild(document.createElement('input'));
var image = document.createElement('img');

image.src='browse'+myLang+'.jpg';
image.id="uploadImgId";

fakeFileUpload.appendChild(image);
var x = document.getElementsByTagName('input');

for (var i=0;i<x.length;i++) {
if (x[i].type != 'file') continue;
if (x[i].parentNode.className != 'fileinputs') continue;
x[i].className = 'file hidden';
var clone = fakeFileUpload.cloneNode(true);
x[i].parentNode.appendChild(clone);
x[i].relatedElement = clone.getElementsByTagName('input')[0];
x[i].onchange = x[i].onmouseout = function () {
this.relatedElement.value = this.value;
}
}
}

//This function is called just as a test to see what will be submitted.
//The output will be different depending on the browser you're using.
function viewSubmit() {
for(i=0; i<document.browseTest.elements.length; i++) {
if(document.browseTest.elements[i].name == "") {
document.write("This is the dynamically generated input. ---- ");
}
document.write("The field name is: " + document.browseTest.elements[i].name + " and it’s value is: " + document.browseTest.elements[i].value + ".<br />");
}
}
</script>

<!--These styles are needed for the magic to work. You may have to adapt these depending on what browser you need this to work in. -- >
<style type="text/css">
div.fileinputs {
position: relative;
/*ie7 and ff2 are colliding*/
width: auto;
}

div.fileinputs .file {
/*For ie7 only*/
width: 235px;
}

div.fakefile {
position: absolute;
top: 0px;
left: 0px;
z-index: 1;
}

input.file {
position: relative;
text-align: right;
-moz-opacity:0 ;
filter:alpha(opacity: 0);
opacity: 0;
/*Required for ff2 ONLY*/
width: 145px;
z-index: 2;
}

#uploadImgId {
position: absolute;
/*ie 7 needs this*/
width: 90px;
}

</style>
</head>

<!--The initFileUploads is called to update the UI upon entering the page. -->
<body onload="initFileUploads();">

<fieldset><legend>Browse Button Localization</legend>
Select Language: <a href="#" onclick="switchToEnglish()">English</a>
<a href="javascript:switchToFrench()">French</a><p>

<form name="browseTest" class="example">
<div class="fileinputs">
<input type="file" class="file" name="originalFileInput"/>
</div>

<br />
<input type="button" name="submit" value="View the Submission Value" onclick="viewSubmit()">
</form>
</fieldset>

</body>
</html>

Feel free to swipe!

What have I done with Liferay?

I've had a lot of fun with the portal. This is a partial list of the standalone portlets I've done (doesn't include velocity, ext env, themes, tweaks and changes in the built-in JSPs)

Standalone Liferay Portlet Apps:

Domain Configuration: Those matching an IP are automatically logged-in.
Front and back ends + Partial Hook
Preferences and View

Dormant Accounts: Lists accounts that have been inactive for 1-3-6-12 months.
Front and back ends

Modified Users: Reports changes that users have made.
Front and back ends
Originally implemented as a service which was later changed to an Oracle trigger based on 3 tables.

User Communication: Allows Admin to mail selectable Groups or individuals.
Front and back ends
Preferences and view

Download Stats: Provides links to the 3 top downloaded documents + hits.
Front and back ends

Document Library: Displays Document Library files as a selectable tree view. Excludes swf files. Displays non HTML and text files in div and all others in 3rd party viewer (Adeptol) except for tar/zips which are downloads. Integrated 'Favourites' functionality (Add and Delete).
Front and back ends

My Favourites: Display 4 documents selected as the 'Favourites'. Has full portlet functionality (minimize, maximize, move, and resize). Also includes management (add and delete) and 'sky scraper' view (view in full screen).
Front and back ends

Search by Date Range: Allows user to search Document Library by keywords and/or date range. Front and back ends

Contact Us/Feedback: If the user is logged-in, name and email address are automatically populated.
Front and back ends

Report Error: Clicking on a link prepopulates form with the error page. It also allows the user to enter comments. Clicking Send automatically sends the form data to the Admin.
Front and back ends
Preferences and view

Import Users: Imports user information from a CSV and from an external database.
Front and back ends

Verify Import: Reports errors or omissions of user information from the Import Users portlet.

Admin Reports: Schedules reports and generates them.
Front and back ends
Preferences and view

GeoRSS: Consumer and Producer using Rome (supports standard protocols)

Various Google portlets.

Cool Online Tools & Resources

The nice thing about the majority of these free tools is that no account creation is required.

Button Factory - http://dabuttonfactory.com/
Create buttons online. It's free and has nice 2.0 buttons!
Drawter - http://drawter.com/
Whoever made this deserves an award. Quite intuitive free tool that allows you to draw your website and generates the code for it.

WhosAmungUs - http://whos.amung.us/
Web site tracking widget including displaying visitor info on a map.

Sosius - http://sosius.com/Haven't tried this personally (yet) but it looks cool. It's an online workspace.

Bubbl.us - http://www.bubbl.us/
Cool mind mapping online.

Buttonator - http://www.buttonator.com/
Modern styles for making buttons.

Charts - http://charts.hohli.com/
Great for making quick charts.

Online Code Converter - http://code.cside.com/3rdpage/us/javaUnicode/converter.html
Convert character codes.

MorgueFile - http://www.morguefile.com/
Stock photos even for commercial use (read the 'license').

Wufoo - http://wufoo.com/
Create online forms for every occassion you can imagine. Versatile and good for inspiration.

280 Slides - http://280slides.com/Editor/
It's basically Powerpoint online. Free and easy.

Color Scheme Designer 3 - http://colorschemedesigner.com/
Design colour schemes online. (Nice interface)

COLOURlovers - http://www.colourlovers.com/palettes
This is an interesting site that not only provides colour schemes but also schemes based on patterns.

Pattern Tap - http://patterntap.com/
Awesome place for inspiration. You can view the different looks of 404 Pages, Audio, Breadcrumbs, Borders, Comments, Contact etc...

Kuler - http://kuler.adobe.com/#themes/rating?time=30
Colour schemes you can contribute and create.

IzzyMenu (Builder) - http://www.izzymenu.com/
Comprehensive online menu builder that doesn't require an account.

Wirenode - http://www.wirenode.com/
This is an "ok" site. It provides a fast way, visual way of creating a site for mobile devices.

doTemplate - http://www.dotemplate.com/
This is the ultimate for lazy visual people. Customize the templates they have online and the templates are actually good!

Web Graphics Maker - http://en.web-graphics-maker.com/
Make backgrounds, lines, and bullets online. Includes transparency on png's.

Bradicon! - http://ico.bradleygill.com/advanced.php
Turn images in to icons.

Text to PNG - http://www.text2png.com/
Interesting concept. Converts plain text into a png. You can either use hosted (free) or grab the source for yourself (requires php).

Iconspedia - http://www.iconspedia.com/
Ok, not a tool but wicked Web 2.0 style icons/buttons/images.

Fresh Badge - http://www.freshbadge.com/
An ok site that generates badges.

Loading GIF Generator - http://www.webscriptlab.com/index.php
Good idea! Create animations to use as a 'loading' message.

Dynamic Drive Button Maker Online - http://tools.dynamicdrive.com/button/
Creates small buttons (eg, rss, xhtml etc...)

Timelines - http://www.mytimelines.net/
Create cut and paste timelines from any feed.

Wordle - http://www.wordle.net/
Create tag clouds.

Iaza - http://iaza.com/
Vast assortment of image manipulation capabilities online.

LogoMaker - http://logomaker.com/
Cool creative customizable icons. Create the logo and link to it for free or download it for a price.

FotoFlexer - http://fotoflexer.com/
Basic image manipulation online.

Maya - http://www.stockfreephoto.com/
Online image manipulation. You can also download this and place it on your own site for free. (PHP)

Pixenate - http://pixenate.com/
Another free online image manipulation site.

Online Button Maker - http://www.advancewebsoft.com/free-oscommerce-cre-loaded-zen-cart-oscmax-button-generator-p.html
Pretty good button generator.

P&P World Map - http://edit.freemap.jp/en/trial_version/edit/world
Allows you to customize the look of a map and dowload it. Pretty cool!

Big Huge Labs - http://bighugelabs.com/
Show off your pics from Flickr or Facebook. Create calendars, motivation posters, badges and more.

CSS Round Corner Generator - http://www.roundedcornr.com/ Pretty cool generator!

Cool Text - http://cooltext.com/
Cool Text

Logo Generator - http://www.logogenerator.com/
Excellent online logo generator and it's free!